How to start a Blog | Beginner's Guide...
STEP
1
Find Your Niche
What are you Passionate about? Stuff or the things you can talk about a lot — your Interest, your hobby, your professional side or anything.
STEP
2
Buy Hosting and Domain
Choose the right hosting provider. We highly recommend siteground or Namecheap. Buy a Domain according to your blog name.
Follow the steps to buy domain and hosting
- Visit Godaddy.com for buying a perfect domain name for your website or blog.
- Search for a Name. Remember to choose something related to your blog name.
For Example, Our blog name is WPGeared, and our domain directly relates to it, that is https://wpgeared.xyz. If you would like your blog to be known by your name, then buy a domain consist of your name. It helps in Branding.

- Check the availability and buy it.
- Now we have to buy a Hosting to Host our blog. Host is where we put all the database and files on server related to our blog such as images, videos, pdfs, passwords everything that requires to run a blog.
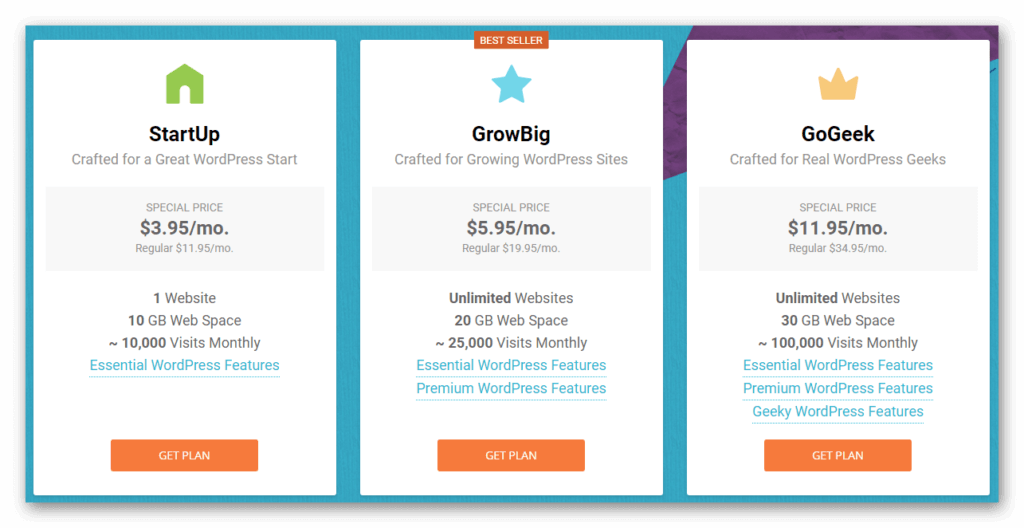
- Go to Siteground or Namecheap.
- Check out their hosting plans and choose one according to your needs. You can upgrade your plan anytime by contacting support provided by Siteground or Namecheap.
STEP
3
Connecting your Domain with Hosting
- Login to your godaddy account and click on my products.
- Click on DNS.

- Scroll down for Nameservers settings.
- Choose Custom from the drop down menu.
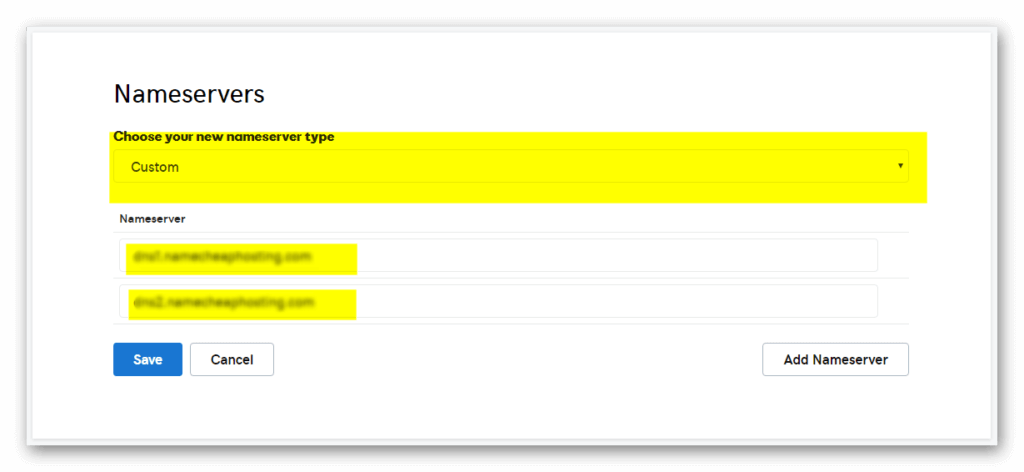
- Go back to your hosting account to get the name servers.
- Click on My Account and then Information & settings.
- Here you will see Account DNS. You need to copy each one by one and paste it in the domain nameservers settings. Leave the brackets part.
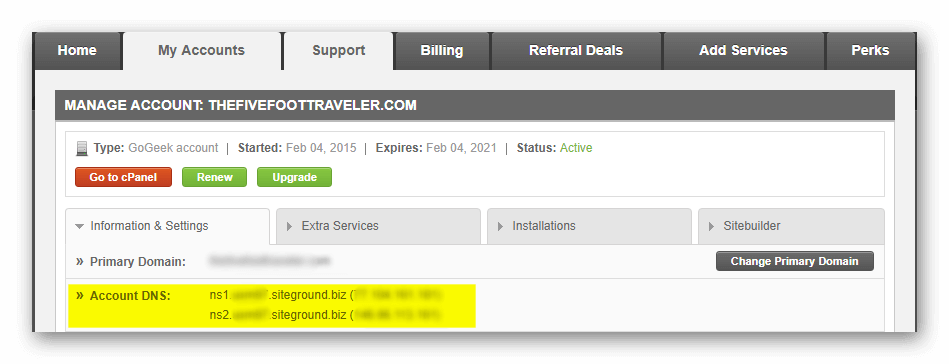
- Click save and you are done.
Note: It can take upto 24hrs to connect your domain with the hosting account. usually it connects in minutes.
STEP
4
Wordpress Installation
After connecting your domain with Hosting we need to setup WordPress.
- Click on Cpanel from your Hosting account and click wordpress installer.


- Click “Install Now”.
- Choose the domain you have connected.
- Leave directory field as it is.
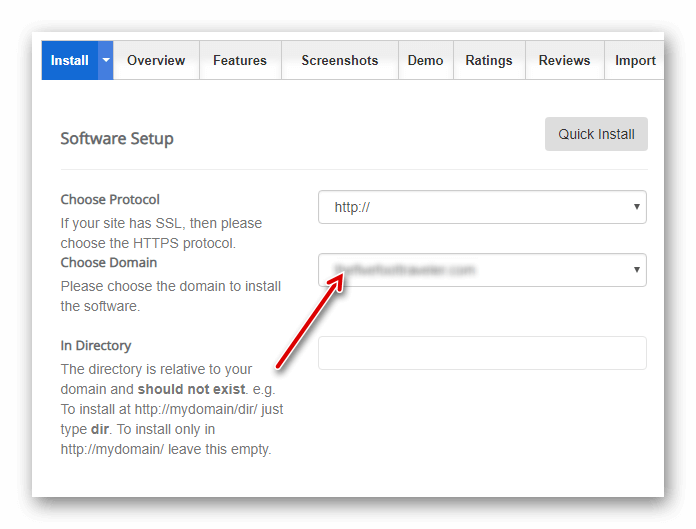
- Enter your site name and site description under site settings. These setting can be change letter.
- Carefully Enter a Username and Password. You will require this password to enter into your wordpress dashboard.
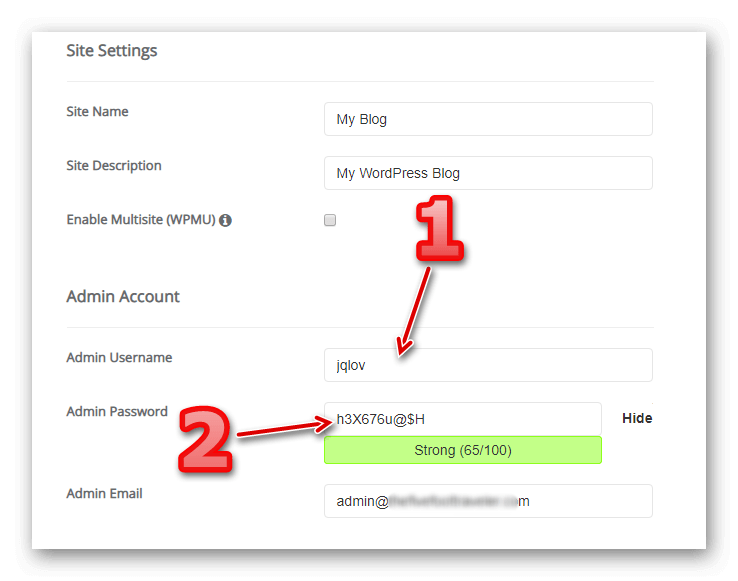
- Scroll down and then click on Install. It will take few seconds to install wordpress with the particular domain you have selected.

Note your wordpress login url or remember it for easy access. Basically you need to add “/wp-admin” after your blog url.
STEP
5
Designing your site and Final Setup
After installing wordpress you will need to Login to your wordpress dashboard for designing and development.
- Open a new tab and Enter the wordpress login url.
http://www.yourdomainname.com/wp-admin
- Enter the same username and passoword you have added while installing wordpress and click log in.
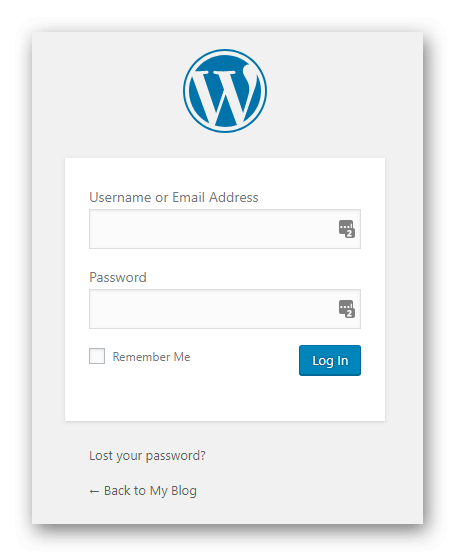
- You are in. Now you have to choose a theme. To do so Click on Appearance and then theme.
- Click on “Add new”.
- Select a Theme you would like your blog to be look a like.
- You can change your theme anytime.
- Give your blog sometime. Design it properly before its launch.
You are Amazing!
You did it perfectly, Enjoy Blogging.
Need Help?
Click on the Messenger button below to connect with us directly. we will be happy to help you.
Don’t Forget to subscribe our Blog to Get our upcoming post “List of Important WordPress Plugins.

