Hello Fellow Bloggers. Hope you all doing well and enjoying your blogging journey so far. I appreciate your hard work and wish you a great success over time. But remember the more successful you are, the more professional you need to be. And today I will help you to move a step forward to enhance your blogging style by having a custom domain. Instead of using a common email address for pitching, connecting with clients, doing professional tasks you will be able to use custom email for more professionalism.
Before Getting into How you can get your free custom domain, I would like to tell you what they are.
Custom Email Address is the address that differs from your common email address such as Gmail, Yahoo or outlook. Instead of having @gmail.com or @yahoo.com at the end of the address, in custom emails, we do have our domain name.
info@yourdomain.com
or
anything@yourdomain.com
It could be anything, user@yourdomain.com or contact@yourdomain.com. you can even use your name before @yourdomain.com. Isn’t it cool to have a custom domain? I know How desperate you are to have a custom email address. So let’s start on it.
- Login to your Hosting account the Domain is Connected to. In this Tutorial, we will create a custom domain within cpanel of our Namecheap Host.Siteground users can log into the siteground account and then click on Cpanel.
- Now Scroll down to Get on Email Section and click on Email Accounts.
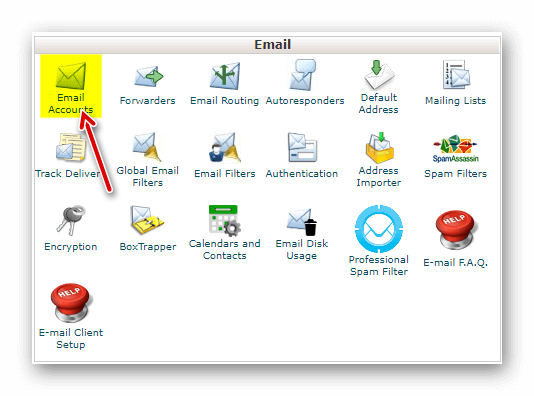
- Click on Add Email Account.
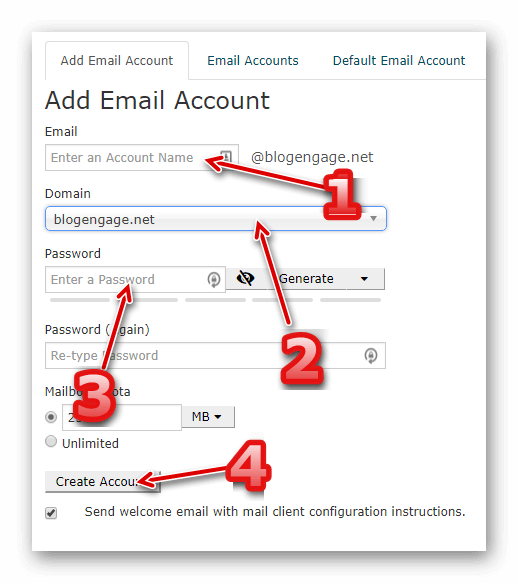
- Fill out the Information
- Add anything like contact, info, yourname before @ to your email.
- Make sure to choose the correct domain in case you have many.
- Enter a strong passoword. Re-type to confirm.
- Click on “Create Account”.
You will get a Success Message on your screen.
- Click on Email Accounts.
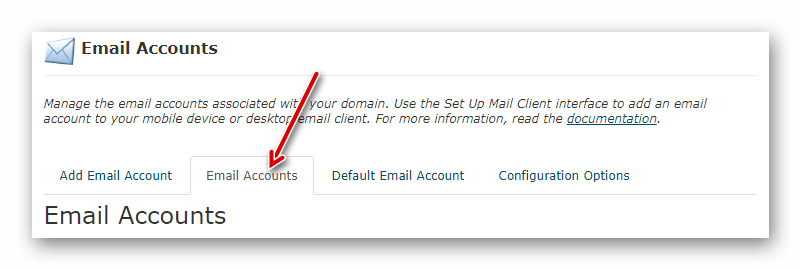
- You will see all the custom email accounts related to your domain.
- Yahoooo! You have your own custom email address now.
How to Access your Custom Email Account?
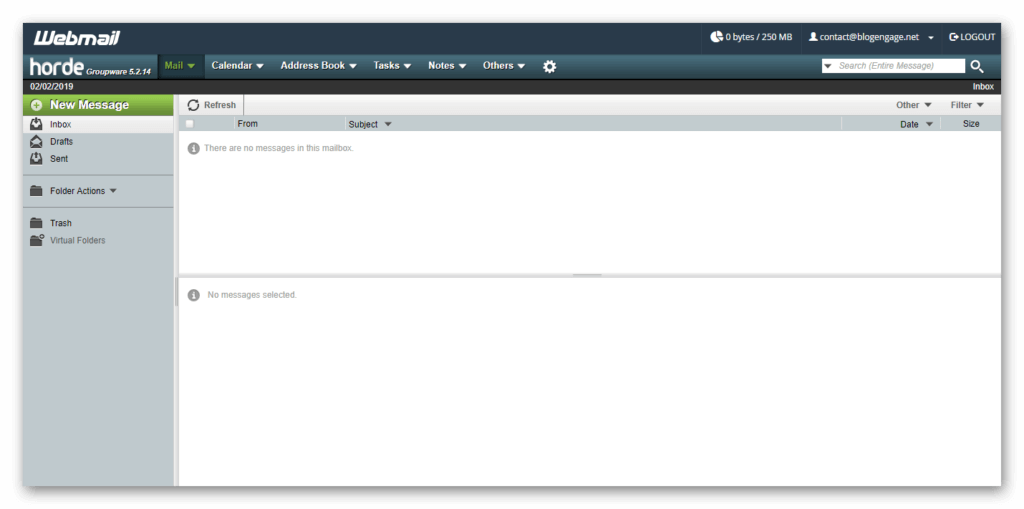
You can Access your Custom Email account within the cpanel. You can send and receive emails using webmail services.
- Click on Access Webmail.

- You can choose among three email services. I personally used Horde because of their user friendly interface.
- You can set any of these service as your default email platform.
- You are all set. Share your New custom email address, publish it on your website or blog to make it more professional then before.
But What! if you don't want the Cpanel Login to check your Emails?
Of course there is a way to connect your custom email with your default Email account such as Gmail or yahoo. which allows you to send and receive emails on your custom address without log in into you cpanel and the best part is it can also be accessible through your handy smartphone devices.
How to connect Custom Email with Gmail
- Go to your Email Accounts from Cpanel.
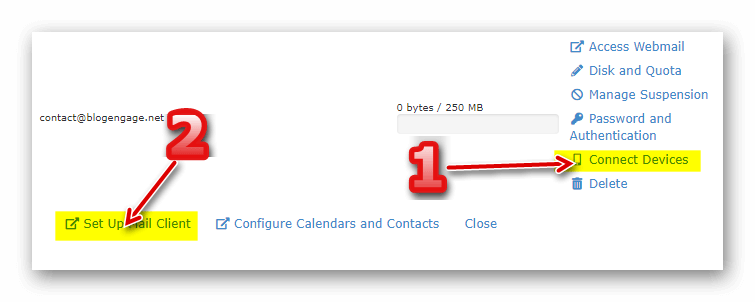
- Click on “Connect Devices”.
- Click on “Setup Mail Client”.
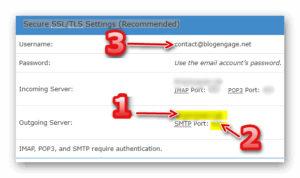
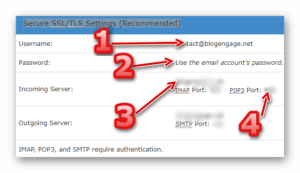
- Scroll Down for “Secure SSL/TLS Settings (Recommended)” Section.
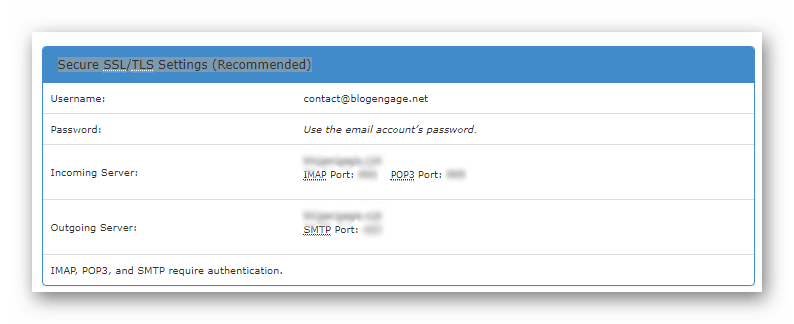 This is the information which we will be require for making a connection between gmail and our custom email.
- Now Open your Gmail Account.
- Click on the Gear Icon for Settings.
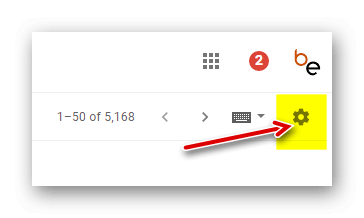
- Click on Account & Import tab and scroll down for “Send Emails” sections.
- Click on “Add another email address”.

- A pop up window will appear. Put a Name you would like to display with the custom email and enter the custom email address and click the “Next Step” button.
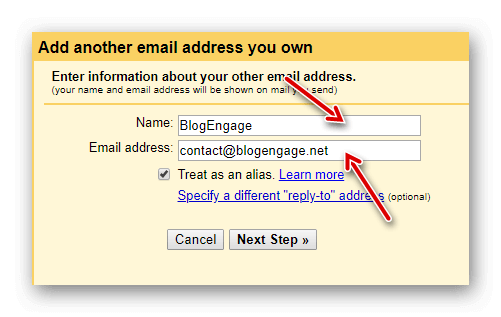
- For a successful connection carefully follow this step.
- Copy the details from your custom email client setup page to gmail. Remember we are configuring “Send mail as:” therefore we will copy outgoing details. Follow the Image below.
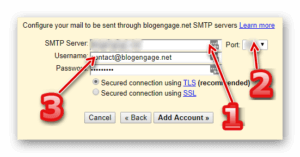
- Enter the password you have set while creating the custom email address.
- Secured connection using SSL (recommended)
- Hit the “Add Account” button.
- it will check the provided credentials and ask you to confirm the email they sent on your custom email account.
- Go to webmail in your cpanel. In my case I was using Horde visit the webmail client and confirm the email.
- after successful confirmation you will be able to send email from your custom email address using gmail.
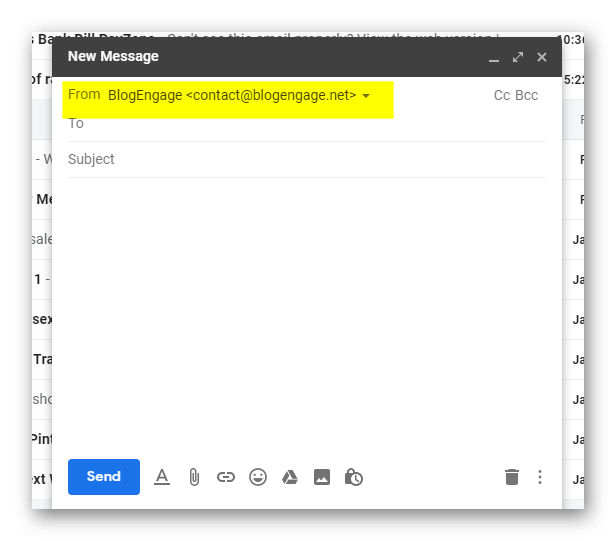
- Now we will configure receiving email to your custom email address within gmail account.
- Open your Gmail. Go to settings–>account & import.
- Scroll down to the section “Check mails from other accounts” and click on “Add a mail account”.

- Another pop will appear asking for the email address. Enter your custom email address and click on next.
- Select Import emails from my other account (POP3) and click on next.
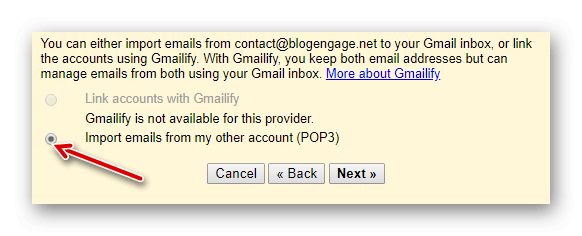
- Now Carefully enter all the information provided on Custom Email Client Configuration Page. Follow the Image below.
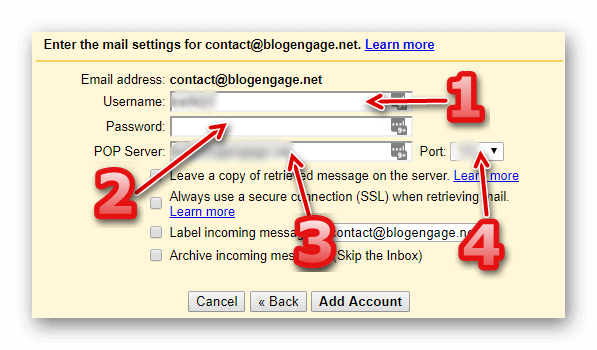
- Tick “Always use a secure connection (SSL) when retrieving mail.”
- Tick “Label incoming messages:”.
- Hit “Add Account” button.
- Done.

It will automatically start fetching emails from your custom email account to gmail account but it takes time. To instantly get all the emails in your gmail inbox you can always fetch them manually. You can go to settings–>Accounts & Import and scroll down to “Check mail from other accounts:” and Click on “Check mail now”. This will instantly fetch all the emails.
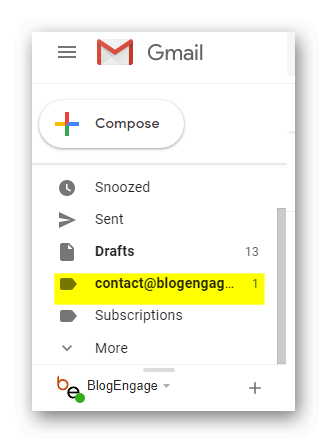
You can check your emails under the name or address you can head over from the left side menu.
You are Awesome!
Need Help?
Don’t Forget to subscribe our Blog to Get our upcoming posts.


